Category Archives: DIY

DIY Nordic Sweater Inspired Tee

title
There are tutorials all over the internet for DIY screen printing with this method or a similar one, so this is really nothing original or innovative. I did really like the idea of doing a pattern, though, and I also did a few steps a little differently than other tutorials I’ve seen. So here’s a step-by-step of what I did and also a link to the pattern I used. Enjoy!

nordicshirt1 Supplies:

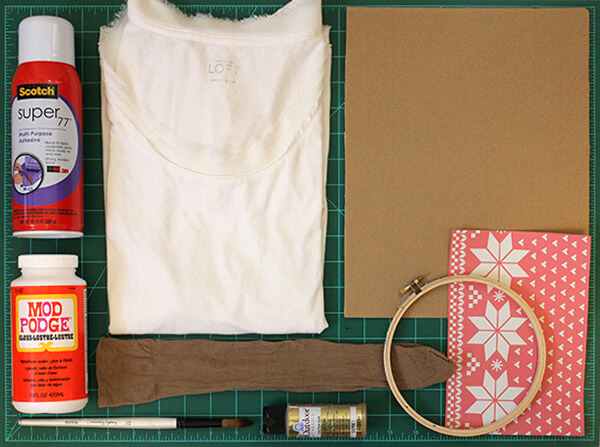
t-shirt, any color will work. I used ivory, but a bright color or even black would be fun, too.

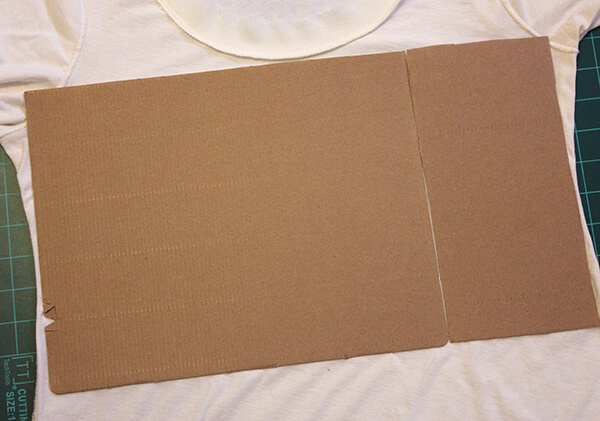
cardboard , the width of the t-shirt or as close to that width as you can find.

a pattern to transfer to the shirt. I used a Nordic sweater pattern that you can download for free here. I wanted to make a shirt that was kind of Christmas-y, but not something I could ONLY wear at Christmas time. A Nordic sweater-inspired print is perfect.

embroidery hoop

old tights/pantyhose or a similar fabric.

thin tip sharpie or similar pen/marker. I personally used a micron pen.

Mod Podge, whether it’s glossy or matte doesn’t matter.

paintbrush(es), I used a small one for applying Mod Podge so I could get thin lines and little details. A bigger brush is better for the paint application. A paint or makeup sponge would work well for the paint application, too.

paint, I used gold, but as I said for the shirt, a color would be really cool, too.

spray adhesive, optional, but very helpful.

Instructions:

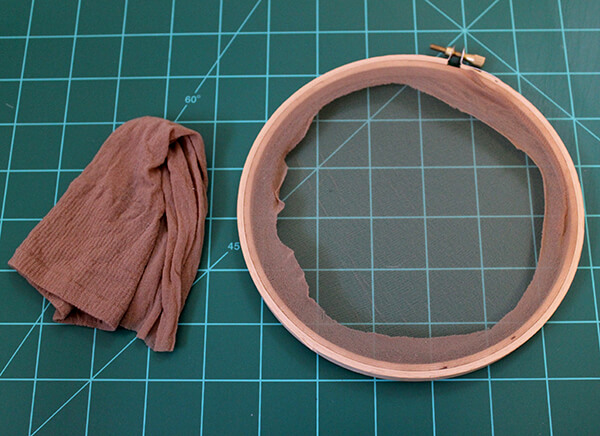
1. Wrap the pantyhose around the inner embroidery hoop. Make sure the fabric is taut, but be careful not to snag it. Slip on the outer hoop and tighten it. cut off the extra hose so it looks like the image below.

nordicshirt2

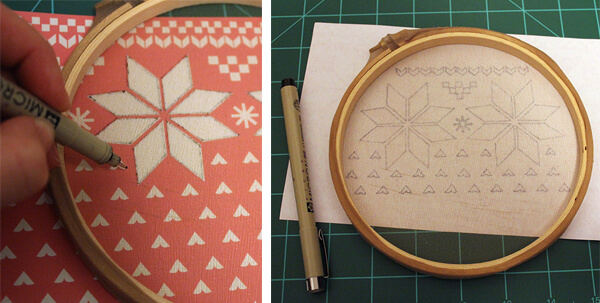
2. Lay your pattern under the hoop and position it where you want to draw it onto the fabric. Hold the hoop in place and carefully trace the image.

nordicshirt3

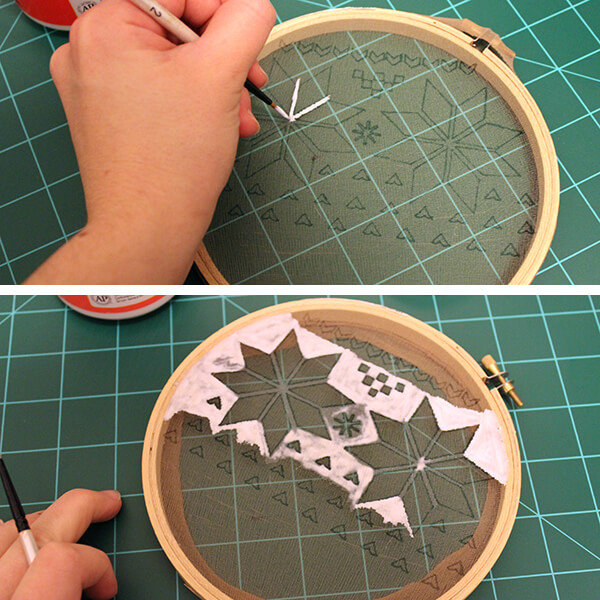
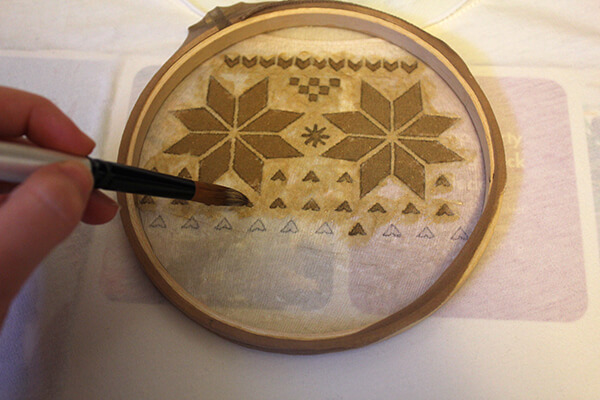
3. Carefully apply Mod Podge to the negative space. So put Mod Podge everywhere where you DO NOT want paint to seep through. With this particular pattern, a thin paintbrush comes in handy since there are lots of tiny spaces and thin lines. Let the Mod Podge dry completely.

nordicshirt4

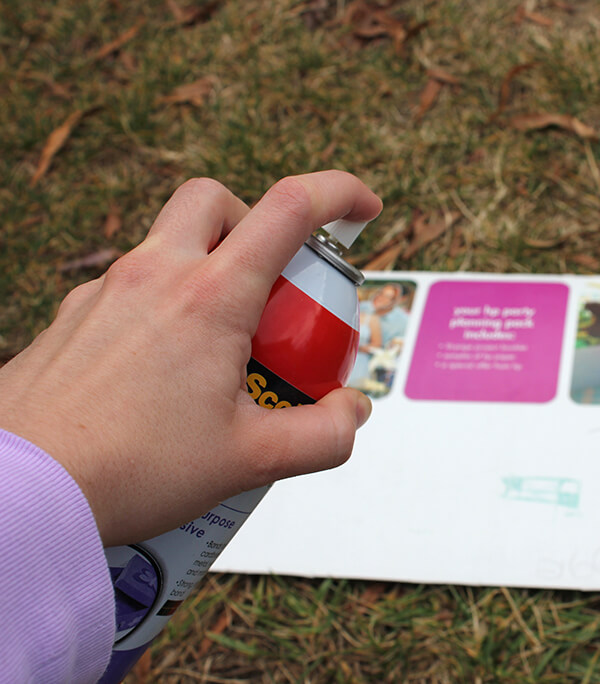
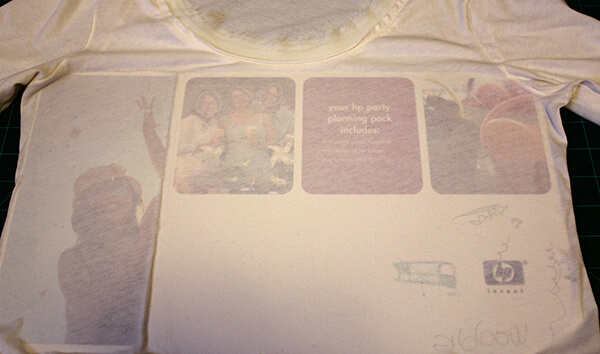
4. Take your cardboard to a well ventilated area and apply spray adhesive to one side (my cardboard had a slick side, so I applied the adhesive to that side because I figured it would be easier to peel the shirt off of it). Turn your t-shirt inside-out and spread it flat, front facing up. Press the sticky side of the cardboard onto your shirt where you’d like the pattern to be (front top). Give the glue a few minutes to dry, then carefully turn the shirt right-side out. The shirt probably will peel off of the cardboard some while you are doing this, but that’s fine. Just adjust it and smooth it back out once you finish turning it right-side out. Now you have a nice smooth surface to transfer your pattern to. If you want, you can skip the spray adhesive and just lay the cardboard inside the shirt, but the spray adhesive keeps the shirt from bunching up or shifting while you work.

nordicshirt5 nordicshirt6 nordicshirt7

5. Line up the embroidery hoop where you’d like the pattern to be on the shirt. If you are using the pattern I used, start in the middle. (I tested my pattern on a scrap of paper first just to make sure it worked well.) Dab paint all over the pattern until you’ve covered it all. Carefully pull the hoop off the shirt. Let this first transfer dry. I rinsed off my paintbrush and hoop in between applications, but be VERY careful if you rinse off your hoop. Mod Podge isn’t completely water resistant, so it may make some of the Mod Podge sticky or wash off. You probably don’t really need to rinse the paint off it, anyway. Once the first application dries, line up the pattern beside it and paint again. Do this until the pattern goes the full width of the shirt. This took three applications for me – the first in the middle, then one to the left and one to the right. I also had to go in an fill in a few gaps (see images below).

nordicshirt8 nordicshirt9

6. Peel the shirt off of the cardboard and you’re done!

Posted in DIY | Tagged , , , , , , , , , , , , | 2 Responses

DIY Peter Pan Collar

I’ve been admiring peter pan collars from afar for quite some time now. I finally decided I’d just make my own. I looked at lots of tutorials, but decided to just wing it and hope it turned out nicely. Well, it worked and I documented the process for you. So here it is, how to add a peter pan collar to a plain crew neck tee or sweater.

If anything is confusing or needs clarification, please ask me about it in the comments. I’d be happy to try and clarify.

Supplies:

a crewneck tee or sweater. I used an old turtleneck. I just cut off the turtleneck.

1/2 yard of fabric of your choice. This is more than enough fabric, but I like room to mess up. I chose black broadcloth. Broadcloth is cheap and I like the texture/weight.

scissors

tracing paper (or whatever kind of paper you want to use)

tape (optional. See step 1)

pen or pencil

pins

sewing machine (unless you want to hand-sew it all)

white chalk or colored pencil (to mark on fabric with)

iron

Directions:

1. Measure the shape/size of the neck opening on your shirt. I tried several methods before I decided on my strange, unconventional way of doing it. I hung my shirt on a hanger and taped little strips of paper together following the shape of the neckline. I marked the front center and shoulder seams with a pen on my paper strips. I carefully removed the little paper strip necklace I created, and whala, there I had it—the shape of my neck opening. Cut the “paper strip necklace” at each shoulder mark so you’re left with 2 pieces, a front piece and a back piece. If this method sounds completely ridiculous, here, here, and here are three other tutorials I found with different methods of doing this step…none of which worked for me.

2. Lay the outline for the front part of your neckline on a piece of paper. Trace along the top edge and mark the center. Do the same wit the back part of your neckline. You can toss those paper strip creations now.

3. Using that top edge you drew in the last step, draw the shape you’d like your collar to be. You only need to draw half the collar for both the front and the back. Make sure the shoulder edges of the front and back pieces are the same width so they’ll line up well. You may want to add a few inches of length to the back piece if you want the collar to meet in the back (see step 12 picture), but I didn’t do this so I can’t give any guidance if you choose to do so. Mine was about 3 inches short of meeting in the back, but I needed it to be that way so the collar would still have some stretch so I could get it over my head.

4. Cut out these two shapes you just drew. Line up the shoulder edges and tape your two shapes together.

5. Take the fabric you’re using for the collar and fold it in half. Lay the shape you made on the fabric with the straight edge lining up with the fold.

6. Trace the shape with white chalk or whatever medium you choose. Trace about ¼ – ½ an inch larger than your actual shape for seam allowance. In my picture, the dotted line shows the actual shape and the solid line shows seam allowance. The dotted line I just drew to guide me while sewing. You don’t have to do that, but I found it helpful.

7. Cut out your shape. You’ll need two of these. When you unfold them, you should have two big Cs.

8. Lay one C on top of the other and pin them together. If your fabric isn’t the same on both sides, make sure the right sides are together and ugly sides are facing out. Now cut your C in half along the fabric fold. You should have 2 shapes that resemble the paper shape you made earlier.

9. Sewing time! Sew your shapes along the bottom edge of the collar. Don’t sew the edge that follows the neckline of your shirt.

10. Cut little notches along the edges below your stitch (be careful not to cut your stitch) so when you turn it right side out it won’t bunch up and be bulky.

11. Turn your shapes right side out and iron them flat. Woohoo! You’re almost there!

12. Turn your shirt inside out. Pin your two collar pieces to the shirt. Line up the top (unsewed) edges of your collar pieces with the neckline of your shirt and pin in place. I found it was easiest to do this with the shirt on a hanger. BE SURE THE SHIRT IS INSIDE OUT!

13. Sew the collar to the shirt along the neckline.

14. Once the collar is attached, turn the shirt right side out. Fold the collar over and iron it down.

15. Enjoy your lovely restyled shirt! :)

Posted in DIY | Tagged , , , , , , , , , , , , | 4 Responses

Metallic & Leather DIY Mousepad

A while ago, I saw a leather mousepad on a blog I follow and fell in love with it. It was kind of pricey, though, and I didn’t want to invest because I manage to destroy them pretty fast with pencil smudge, ink pens, etc. So if you’re in the market for a new mousepad, here’s how to create your own.

SUPPLIES:

leather scrap large enough to make a mousepad with. I bought a piece of 8.5″ X 11″ tooling leather from a craft store for about $6. It’s thick and durable, perfect for this project.

metallic spray paint. I used Rust-oleum copper spray paint I had left over from another project. You could use a pretty, bright color rather than a metallic if you want.

masking/painter’s tape.

exacto/utility knife.

cutting mat or scrap cardboard

metal ruler (one with a cork grip is best for safety)

recommended: leather protector and/or clear gloss sealer (see step 4)

INSTRUCTIONS:

1. Decide what size you want your mousepad to be. I made mine 8.5″ by 9.5″. Measure how much you want to cut off and line up your ruler where you need to cut the leather. On a protected surface (I used a cutting mat, but scrap cardboard would work too), use the ruler as a guide to cut a straight line with your exacto knife. Be very careful – don’t cut yourself. I just used enough pressure to score the top layer of the leather. That creates a groove that will guide your knife so you don’t have to use the ruler anymore. I went back over several more times with the knife until I had cut all the way through. Just be patient and careful so the cut will be clean and so you don’t hurt yourself. I had to go over it about 5 times to cut all the way through the leather, but it really depends on the thickness of the piece you use.

2. Use masking tape to mark off the area(s) of the leather you don’t want to paint. I only put one strip of tape on the leather because I didn’t want the tape to mess it up. I taped down scrap paper to cover the rest of the area I didn’t want to paint. For mine, I sectioned it of diagonally to make a colorblock design like the mousepad I fell in love with, but you could really do anything – stripes or chevron would be cute (just be sure to test the tape on your leather first to make sure it doesn’t hurt it).

3. Take it outside and follow the directions on the spray paint bottle to evenly coat the leather. Let it dry (most spray paints take 24 hours). I took the tape and paper off the leather as soon as it was dry to the touch (about an hour) so the leather wouldn’t have to be susceptible to the glue of the tape for longer than necessary.

4. Now you have a pretty mousepad! After about a week of use, mine started to collect dirt, particularly on the unpainted half. I would highly recommend that before painting the leather, you apply some sort of leather protector. I say before because many leather protectors are oils, and your paint may be oil-soluble. You would need to apply it to the leather and let it dry BEFORE painting it. Since obviously it’s too late for me to do this, I decided to paint the unpainted half of my mousepad (I used masking tape again to protect the metallic half). I used acrylic paint in a chartreuse yellow color (I used a brush, but spray paint would work, too). I actually really like the pop of color. If you decide to do this, you have to apply several coats of paint to get an even color because leather is porous. I’m also planning on spraying a coat of clear gloss onto my mousepad to add an extra layer of protection (I’m using Crafts Etc. clear acrylic gloss sealer – I already had it from another project). This will also hopefully give it a smoother surface that will be less likely to collect dirt. This might be a good idea even if you choose not to paint the entire mousepad. I would test the gloss on a scrap of leather first, though.

I’ll share the results of my gloss application as soon as I finish.

Have an awesome Monday and be sure to stop by tomorrow – I’m doing my first ever giveaway!

Posted in DIY | Tagged , , , , , , | Leave a comment

Halloween Costumes

I’ve got a computer again, hooray!

Today I’m going to share with you some halloween costumes that my friends and I have come up with the past couple years. They are all handmade and mostly pretty simple to put together. SO if you need a costume and still have no idea what to do, hopefully these will give you some ideas!

Two years ago, my sister visited me at school and we went to my friends’ party as Willy Wonka and an Oompa Loompa. I bought the purple blazer from Goodwill and painted the W on it with acrylic paint. The loafers are also from Goodwill and the rest of the outfit is stuff I already had. The top hat and the cane were from a Halloween store, and the bow tie I made out of some craft felt. For the golden tickets, I found a picture of the original and recreated it in illustrator. I painted some cardstock with gold paint, let it dry, then printed my design onto it with my regular ole inkjet printer (I covered it with clear tape so the ink wouldn’t smear). For my sister’s costume, we bought some green hair spray (which, as you can see, worked great) and borrowed some of my friend’s white face paint for her eyebrows. We used bronzer for her face and just LOADED it on. The suspenders are just some rope I had leftover from a project, and the rest of the outfit is stuff we already had.

My friend Hannah went as Harley Quinn from Batman. For the top, I think she took a red shirt and a black shirt (Goodwill), cut them in half, and sewed a black half to a red half. She did the same for the pants. She painted one of her boots red, and all the other details like the collar and the hat, she sewed herself. She’s very devoted to making awesome costumes!

Last year, I went as Madam Hooch, the flying teacher in Harry Potter, and Hannah went as Rogue from X-Men. My white hair is the result of a little bottle of hair paint from a Halloween/costume store. The broom is from the same store. My outfit consists of a navy belted dress, a white button-up shirt, a black trench coat, knee-high black socks, and grey boots – all stuff I already had. Hannah’s outfit mostly consists of stuff she already had as well. All the green details are made from a green t-shirt she bought at a craft store.

Here’s a comparison of my costume with the actual Madam Hooch.

I hope you have a fun Halloween! Do you have a creative costume planned?

Also posted in FUN | Tagged , , , , , , , , , , , , , , , , , | 3 Responses

  • Hey! I'm Maggie, a graphic designer, crafter, devoted secondhand shopper, Doctor Who fanatic, and dog-lover. Stick around and explore!


  • Enter your email address to receive notifications of new posts by email.